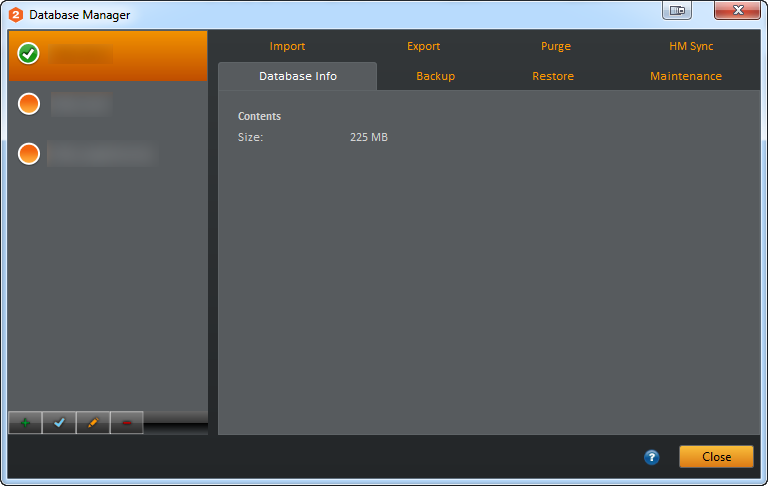
Database Info
- Green Plus = Create a Database
- Blue Check = Make Selected Databse Active
- Pencil Icon = Rename the database (you can only rename an inactive database)
- Red Minus = Delete Selected Database
Database Status window shows:
- Size of Database*
Backup
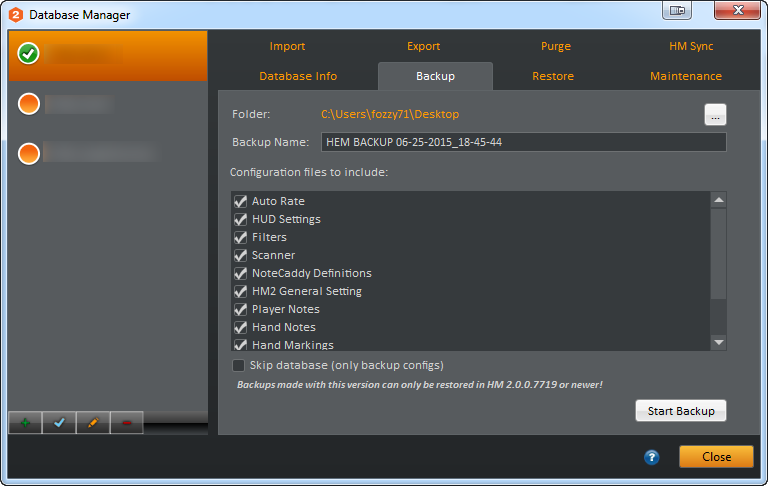
The Backup Tab saves the current Database and HM2 configuration settings
- Clicking on the ... button on the right top corner changes the backup location of the backup file
- [x] Skip database will backup only the configuration files
- Start Backup = Starts the backup process
- When the backup is complete, it will display a "Backup Completed Message"
Restore
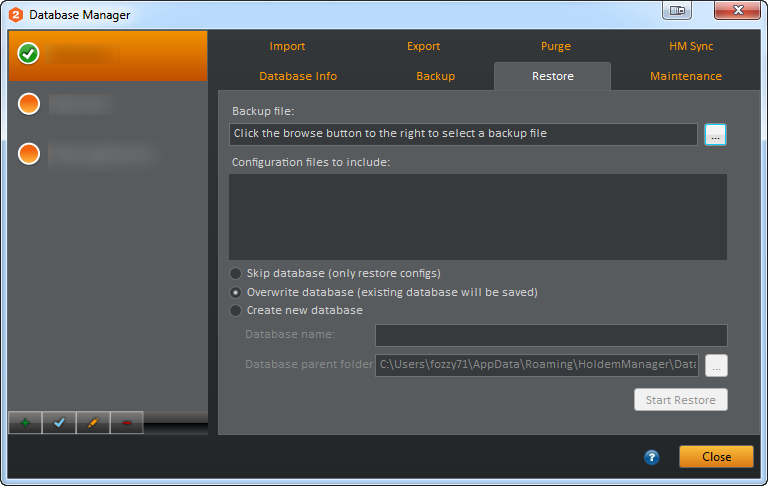
Restore loads a backup file created with the backup option
- Select backup file
- Select what configuration files to include
- Choose to make a new blank database or overwrite the old database
- Click Start Restore
Maintenance

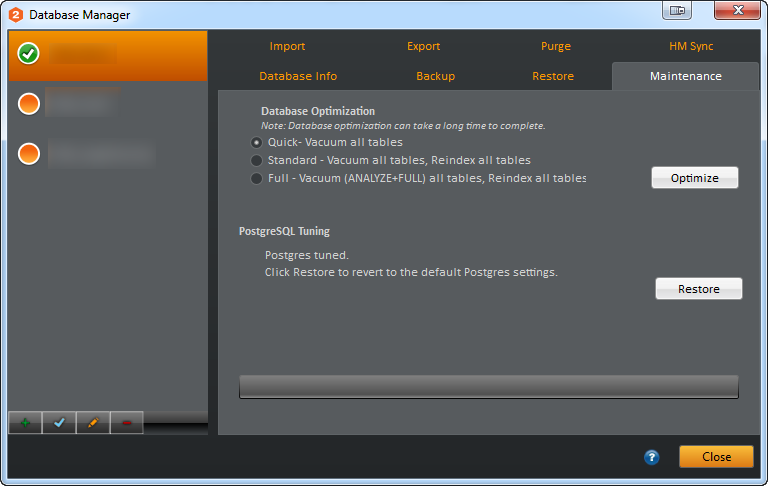
Warning: Postgres is 3rd party software and we strongly suggest not using these features unless you are experiencing slow database performance.
Maintenance has two options. Both options are custom PostgreSQL tuning options.
Optimize = Optimizes the database so queries are returned quicker and more efficently.
- Quick - Vacuum of all tables
- Standard - Vacuum of all tables and reindex of of indexes
- Full - Vacuum analyze of all tables and reindex of all indexes
Import HM1 Databases
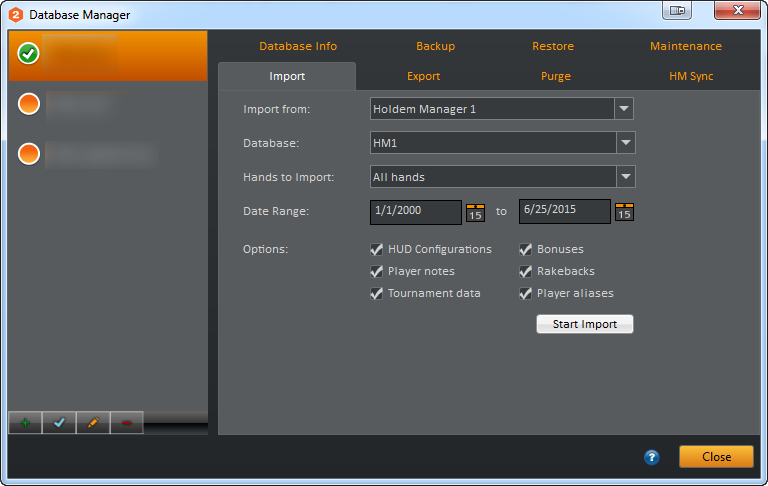
Import HM 1 databases here
- Import from - Choose the Default 'Holdem Manager 1' option
- Database - Select a HM1 Database to import into the current HM2 database.
- Hands to Import - Choose Import 'Hero Only hands', 'All Hands' or 'No hands' if you only want to import the selected 'Options'.
- Date Range - Select a date range for the HM1 imported hands.
- Click Start Import to start the import process.
**NOTE**
- Hands that were purged in an HM1 DB will not exist and cannot be imported into HM2. They will need to be reimported from the original hand history files.
- If you experience any issues with the HM1 to HM2 import process/results please see this FAQ.
Export Hands
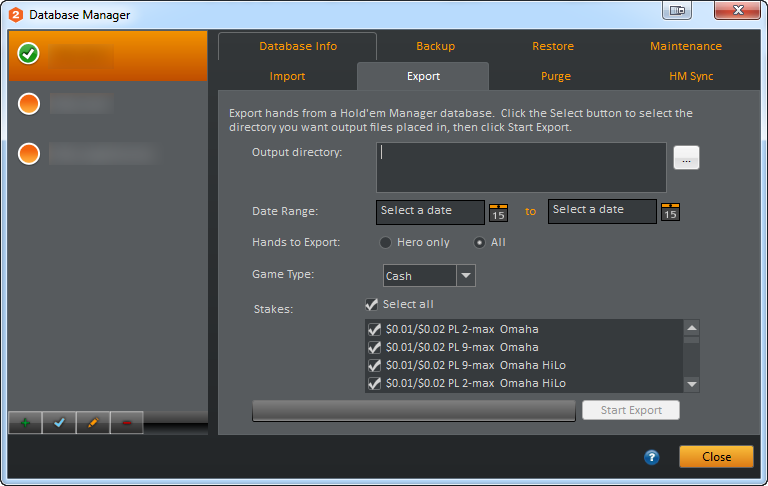
Export hands from your HM2 database
- Output Directory - Select a folder to save hands in.
- Date Range - Select a date range of the hands to export.
- Hands to Export - Select Hero Only or All
- Game Type - Select Cash or Tournament
- Stakes - Select the stakes to export
- Start Export - Start the hand export process.
Purge Hands
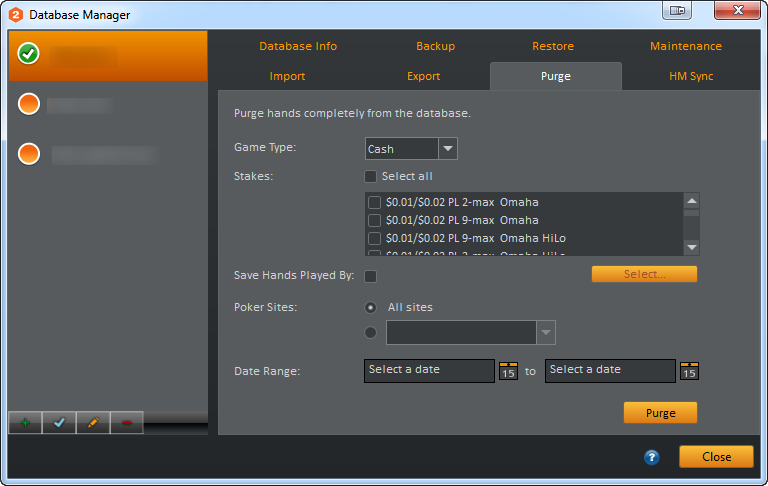
Purge removes selected hands from the database. Filter hands by:
- Game Type - Select Cash or Tourney
- Stakes - Select the stakes to remove
- Save Hands Played by - Use this to delete all other hands but hero hands
- Poker Sites - Select all sites or a specifc site to purge hands from
- Date Range - Select the date range of the hands to purge
- Purge Button - Starts the Purge Process.
*This is not recommended as the databases in HM2 only take up about half the space of HM1. Stats will not be saved after purging hands.*
HM Sync
HM Sync allows the combination of databases across two PC's.
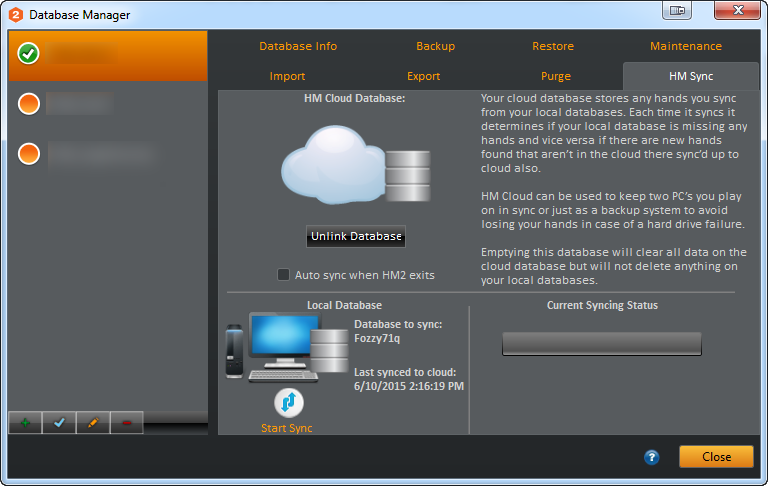
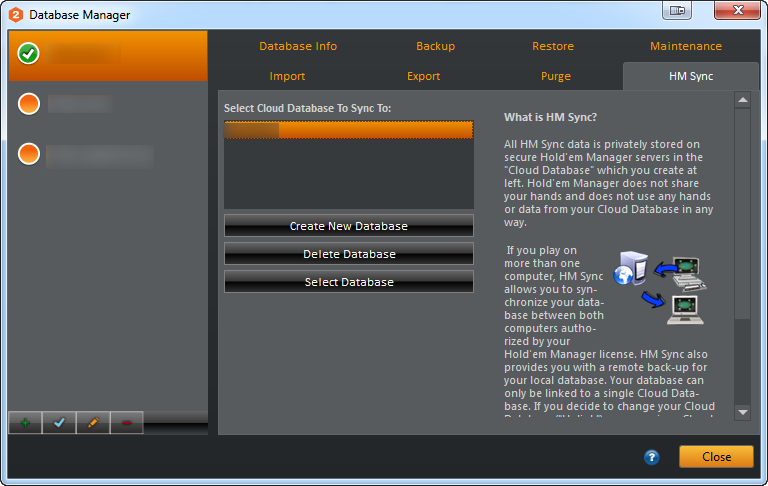

HM Sync uses HoldemManager.com email and password for validation.
*Please note that the HM Sync currently only syncs the hands from your database. It does not sync any HUDs, Settings, Configs, Player/Hand Notes, NoteCaddy Definitions, etc.
- If you want to transfer your HUDs, Settings, Configs, Player/Hand Notes, you will need to use the Database > Backup [x] Skip Database option on the PC1 and then Database > Restore > [x] Skip Database and [x] OverWrite Database options on PC2.
- NoteCaddy will write notes on the hands in the PC2 Database after it has been synced.
Specific Instructions to use HM Sync:
- Select > HM Sync > Create New Database > Name the Cloud Database
- Click the Start Sync button
- Wait for the Sync Progress to complete
- Open the Database > HM Sync menu on your 2nd computer
- Highlight the Cloud database and click the Select Database button
- Click the Start Sync Button
- Wait for the Sync Progress to complete
*Note:
- This will not sync any personalized player notes or hand notes. It only syncs the hand history files themselves.
- There are also some known issues where the results are not syncing properly. If you have any of these problems I would suggest you backup the database on one computer and restore it to the 2nd computer to get the most accurate tournament results. Then you will want to use Dropbox to synchronize your C:\HM2Archive folder on both computers and each time you change computers you will want to import the newest files from your archive manually: Hand Importing > Manual Hand Import > Import Folder > C:\HM2Archive\Site\Year\Month\...


 The article has been updated successfully.

